 |
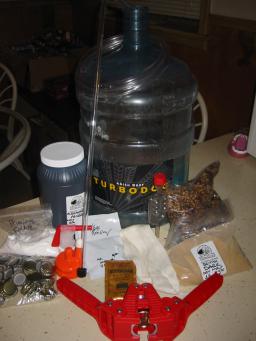
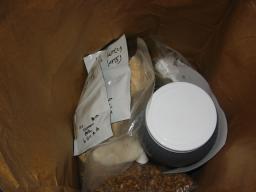
First, we start with our beer kit, freshly procured from the always
affable staff of Brew Ha Ha. Only the finest in beer supply sold out
of a 200 year old building with cement floors. Got love New Orleans.
The kits usually consist of grain, liquid malt, dry malt, hops, yeast, the big
"tea bag" (snicker) you put the grain in, and assorted bottle caps and brewing
paraphernalia.
|
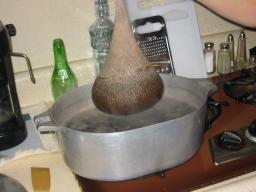 |
First things being first, we now bring anywhere from 1.5 to 3 gallons of water
close to a boil and steep our grain. This is much like steeping tea I'm told,
but since I'm neither a woman, a limey, or a gay man, I wouldn't know because
I've never steeped tea. With that said, get to steeppin' while the steepin's
good.
|
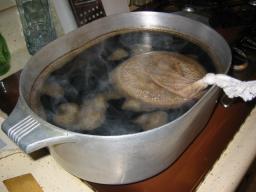 |
Just continue getting your steep on for around 30-45 minutes.
|
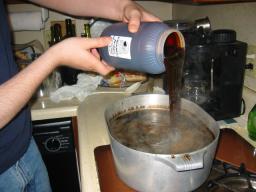 |
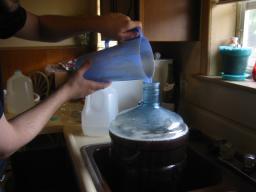
Once your steep has been fully gotten on, time to add your precious
reagents. Pictured here is me dutifully pouring in the liquid malt
which has a consistency somewhere between molasses and "if you get it
on your hands you will have to boil them to get it off." If I could
find a way to make this stuff flammable, I could put the napalm industry
out of business. If there is a napalm industry. I'll get back to you
on that one.
|
 |
Now we add our dry malt, which is much more manageable than it's cousin,
the liquid malt. Just pour at will. One thing to note, and I'm not sure
on this, I think you should add the dry malt first. It doesn't seem to
happen in every case, but once we did liquid then dry and ended up with
balls of what could be described as concrete floating around in the pot.
it seems that if the liquid and dry malt meet in their respective states,
they tend to clump together and make the entire brew process quite unpleasurable.
|
 |
Let's get hoppin! Dump yo hops on in that biznatch, but hold up! You bess make sure
that you leaves some if yous gonna be adding finishin' hops latah. *sound of throat
being cleared*. Some brews call for "finishing hops", which means that you will be
adding some more hops right before its finished boiling. My going theory is that
these hop won't break down during the boil, therefore more of the "flavor" of these
hops will make it to the finished product. Of course I have no grounds for this theory,
they could just be a hops sacrifice to the gods of home brew beerdom.
|
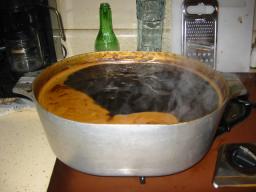 |
Here's the exciting part: you let it boil for a long time. Well, like 45 minutes or
so, but its a long time in beer years. One more thing, I've had this stuff double
in size during this boil, so make sure you have room in your pot and maybe have a reserve
handy incase your cup runneth over.
|
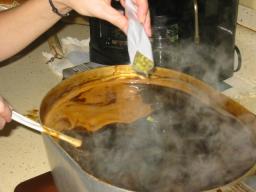 |
After its boiled for a while, if you have finishing hops, dump those in at the
time prescribed in your recipe. If you're not following a recipe, please save some
of this beer for me, I've never tasted gonzo beer before.
|
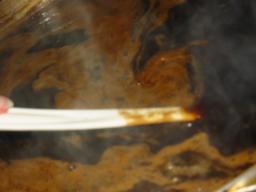 |
Nothing much here, just playing with our wort. No, not genital warts, wort. Wort is
what you call this nasty muck you've just made. Don't hesitate to look over it and wonder
how this foul crap will turn in to tasty beers. If you're high while you're pondering this,
be careful not to lose track of time.
|
 |
They say you can use tap water for your beer, but bottled water supposed to taste better.
I went ahead and shot for the best of both worlds. Filtered tap water. The cleanliness
of bottled water, with the "down-homedness" of tap water. I am the smartest man alive.
Because my filtered water shooter thing is so goddamned slow, I rigged it to work autonomously.
|
 |
Once your wort has boiled for the required amount of time, you want to bring it down to room
temperature. I did this by filling the sink up with cold water and sitting the pot in it.
I didn't take any pictures of it, so just close your eyes and picture a pot of brown stuff in
a sink full of ice water. After it was cooled, we realized that we didn't have a funnel to get
it into the brewing carboy (which is a fancy name for a water cooler jug), so we had to scoop it
out with a pitcher and pour it on in. After you've gotten in all in, top it off with more water
until the brewing vessel is full to satisfaction.
|
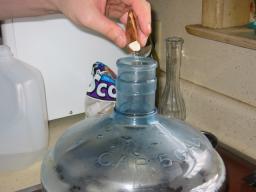 |
Here's where you sprinkle the yeasty beasties evenly over the top of the brew. Since I'm
using this jug, evenly means sprinkle a little, jostle the jug a bit, sprinkle some more, lather,
rinse, repeat. The point of the cooling the wort in the previous step was in preparation for this.
You see, yeast are alive. I'm not sure how advanced their civilization is, or what language they
speak, but I assure you they are alive. If you were not to cool the mixture down to room temperature,
they would die from "temperature shock" as you dumped them in. Now I know in the human world that
going from cold to hot very quickly will cause a slumbering person to wet the bed and produce
uproarious laughter from those in witness, but in the yeast world, it is certain genocide.
Or yeasticide.
|
 |
Now the yeast are swimming around greedily tossing all the sugar they can find into their
gapping maw's (not sure if they have actually "maws", but I'm going for imagery here people),
unbeknownst to them, they are peeing and pooping out precious alcohol. This process also creates
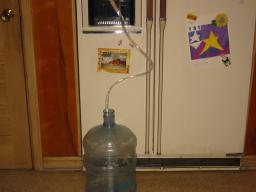
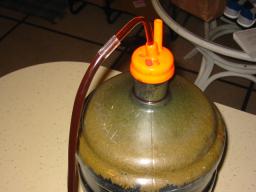
carbon-dioxide. Now, you can't seal the container, because this CO2 (as carbon-dioxide is know as in
some intellectual circles I run with) will build up and cause it to explode. BUT! you
can't leave it open because if oxygen gets in there, something bad that I don't remember happens.
The solution: the airlock! The picture is grainy because its a shot from a video that you
get the privilege of watching if you click on it! Be in awe of its dog-ass quality. Resolution:
Crappy X Fuzzy. (Also note, I put red food coloring in the airlock's water so it would show up
better in the video).
|
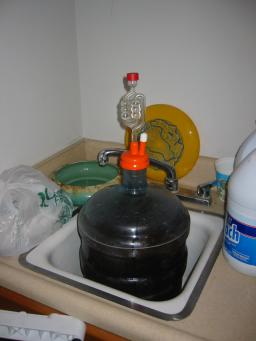 |
There we go, we have it all ready for its 10-14 day vacation in our laundry room. Early in the
fermentation process (1 to 3 days), it sometimes has the tendency to foam up and out of the
airlock, so we sit it in a spare sink in there.
|
|
Here's where I should have taken some pictures of the changes that happen in the following two
weeks, but I didn't, and they're not really that exciting anyway. Basically, your airlock goes
crazy, it foams up, then the airlock calms down and the foam settles. That's the first three or
so days. After that it just sits there and poops air out every couple seconds or so (depending
upon what you're brewing it in and what kind of airlock you have.).
|
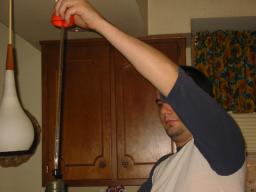 |
Beer is done! Time to start bottling those babies! Start by pulling out your airlock and
inserting your store bought rigid siphon tube thingy into the carboy almost to the bottom. You
will not want to rest it on the bottom, because, if you actually brewed beer and not let wheat
broth fester for two weeks, there should be a thick layer of dead yeast resting on the bottom.
You would really do well no to suck massive quantities of this out when you siphon.
|
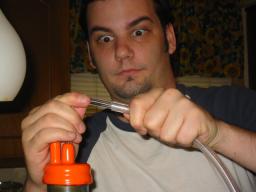 |
Attach your siphon hose to your rigid siphon thingy. Be sure to know how siphoning works before
you siphon. If you don't know what siphoning is, get off my website, you moron. Basically we're
going to siphon the beer out of the carboy into the bottling bucket. You don't want to bottle it
from the carboy due to the massive amount of funk in it at this point; and you don't want to pour
it into your bottling bucket, because the pouring process with carry all of said "funk" with the beer.
Siphoning is your best option. (Hint to siphoning morons: be sure the bottling bucket is closer to
the ground than the carboy, that how siphoning works: 1 part air pressure, 1 part gravity).
|
 |
Now comes the part where your shady past walking the streets of North Hollywood come into play:
Suck! Suck! Suck!
|
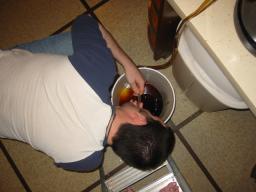 |
As you can see I'm not as well versed as you in the sucking arena, it took me many attempts to
get it flowing good. I'm quite proud of this fact.
|
 |
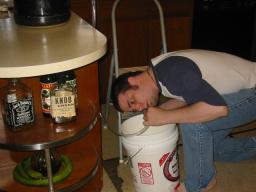
Not that I even come close to your sucking prowess, but look at that strong, steady flow. I
command that from now on you call me the Siphon Master: Ruler of all Air Pressure Physics.
You will rest golden laurels on my head and throw rose petals beneath my feet as a walk.
|
|
Here you dissolve sugar into two cups of hot water and pour it into the bottling bucket and stir
well.
I forgot to take a picture of this, so instead you'll get a longwinded explanation. See, at this
point, the yeast have eaten through mostly all of the sugar. But once they're bottled, you want
them to start up again, but not for the alcohol, for the production of CO2 so that when you
finally open your bottles, you get the pop and fizz of carbonation! The sugar gives the yeast
a little more food to work with in the bottles to make this happen.
|
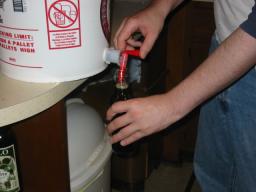 |
Time to start bottling. You can pick up one of these nozzles thingies at any brewing supply
store and install it into a bucket. From what I've read you want to fill up the bottles to about an
inch away from the top. Seemed to work for me.
|
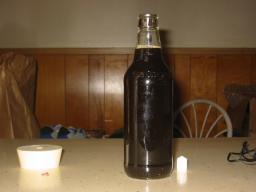 |
Here's a good example of what a beer should look like after its been filled. Looks kinda like
a bottle of beer with no cap. That's because that's exactaly what it is.
|
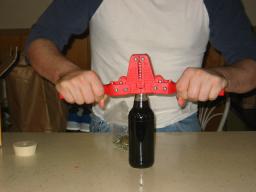 |
After the bottle's full, you take your caps that usually come with an ingredient kit, and a
bottle capper, which is unfortunately kind of necessary, and commence the capping.
|
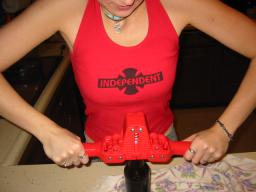 |
Same thing, but with boobs:
After the bottle's full, you take your caps that ususally come with an ingredient kit, and a
bottle capper, which is unfortunately kind of necessary, and commence the capping.
|
 |
*A Chorus of Angels Sing in the Background* "Hallelujah! Hallelujah! Hallelujah, Hallelujah!"
My first ever self made beer. A single tear rolls down my cheek (not pictured).
|
 |
With the beer bottled and waiting for precious carbonation to take place (along with a couple
other things that happen after its bottled that I never paid attention to), we notice our lives
have become drab and dull, with no more beer fun at hand. No worries! Just hop by the
home brew supply store for another kit and get crackin' all over again! Life is good again!
|
 |
Once your beer has sat bottled for 4-5 days carbonating, and another 4-5 day in the fridge, it
finally comes time for my favorite part of beer brewing: Consumption!
|

|
 |
The End
|